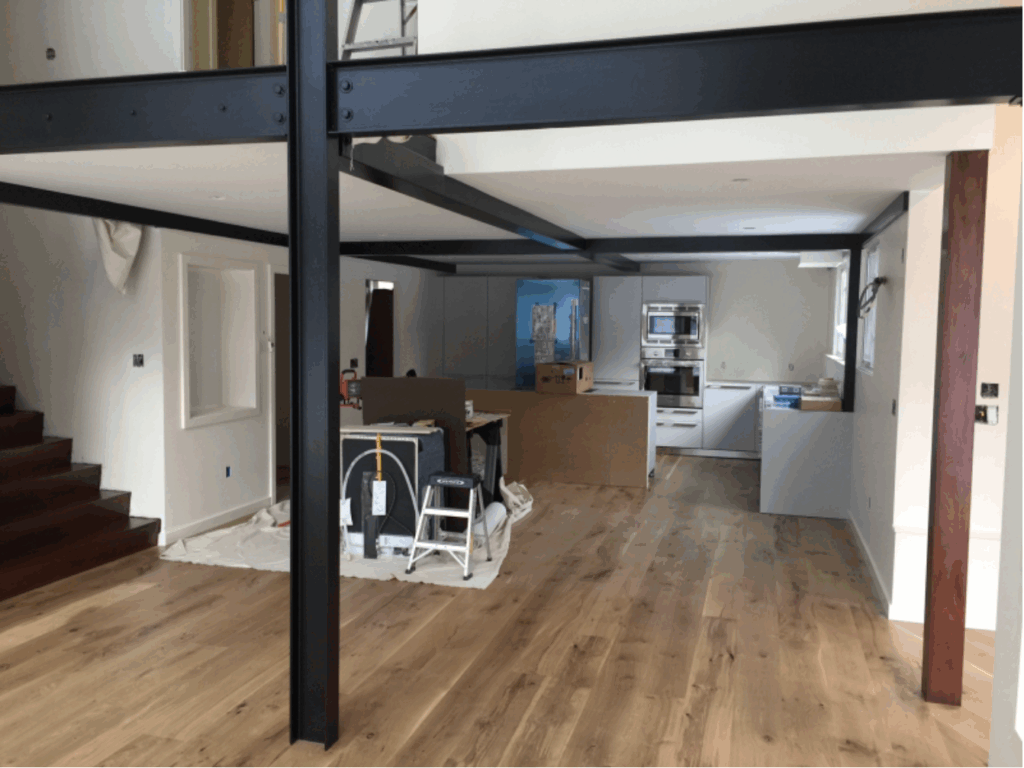
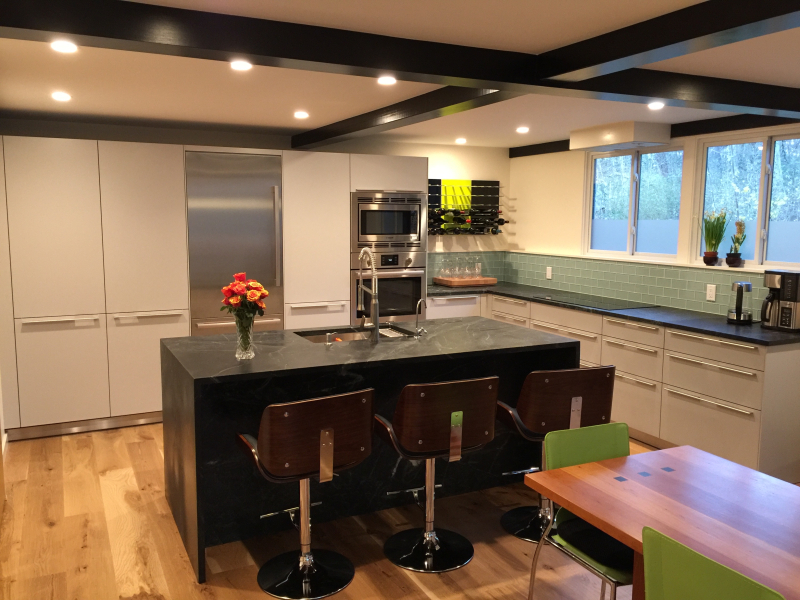
Your cart is currently empty!
Category: The Techbuilt House
-

Apollo Space Artifact Gallery
I used the renovation and addition project as an ideal opportunity to build a showcase for my collection of Apollo lunar mission artifacts.
It was important to plan for where things would go from the start of the project more than two years ago. We set aside the original entrance hall as the gallery space and our architect, builder, and the various subcontractors all prepared from the start to build the gallery to my specifications.
I was fortunate to work with Bob Segal who helped with the design concepts and sourcing the materials.
We wanted there to be flow from other parts of the house to the gallery, so we hung my painting by Alan Bean (the 4th man to walk on the moon) in the living room next to the stairs to the gallery and incorporated the balcony that overlooks the gallery. Even though the gallery is a separate room, the Apollo theme is unified into the home but doesn’t overwhelm it.
When we renovated the gallery area, we eliminated the windows and door to the outside so the gallery would be dark. The ceiling was set with strong beams to support the LM descent engine thrust chamber. There is electricity in all the right places so I could have the spotlights, artifact lighting, lighting in the cabinet, and sound effects with no wires visible.
Here are a few features of the gallery. Many were surprisingly cost effective:
- The lunar images are from Mike at Moonpans and are printed on vinyl.
- The flooring is a terrific color gray and is sold as garage flooring at Home Depot for $1.35 per square foot.
- The image wash lighting at the top and bottom of the lunar images, spotlights in the ceiling, cabinet lights, red engine light in the LM descent engine thrust chamber, backlight for the CM star chart panel (flown on Apollo 9) and lighting around the CM window (flown on AS 201) are all centrally controlled via an integrated Lutron system. With one button, I can change “scenes”. All of the switches and transformers are hidden under the stairs.
- The wonderful rail system was sourced from Octanorm and the fittings for each artifact are custom built. This modular approach allows me to swap artifacts in and out of the gallery space or to remove and hide valuable artifacts – like the Apollo 12 flown rotational control handle – if I have a large party and don’t want red wine to end up on it.
- We went with black paint on the ceiling, back wall, and back door (which leads to the library). The smoke alarm housing will be swapped for black in a few weeks.
- The cabinet system is from IKEA but is highly modified. It was purchased in the kitchen cabinet department and is two cabinets on top of one another with stainless steel drawer fronts added. We enclosed the stacked cabinets in MDF board painted black and also painted the wood around the glass doors in black. The lighting in these cabinets is terrific – IKEA sourced puck lights in the top to light the artifacts on the glass shelves and individual lights in each drawer to light up stuff in them when a drawer is opened. The entire cabinet system including lighting was under a thousand dollars.
- There is a black Sonos 1 speaker hidden in the back corner, which I control with my iPhone to play NASA audio. I can cue up, say, Houston to spacecraft audio of the Apollo 11 landing.
And of course, as souvenirs for my VIP gallery visitors, on the floor in the corner I have a bunch a bunch of copies of my book Marketing the Moon which I wrote with Rich Jurek and Apollo 17 Commander Gene Cernan (who did the foreword).
The biggest challenge I foresee is resisting the temptation to add too much stuff. The gallery works great because it’s got breathing room. There are interesting things to look at but it is not overwhelming. Yes, I have many more artifacts I would love to bring out, but I need to keep reminding myself not to display them all at once.
-

Main Stairs
The main stairs go from the new entrance hall up to the second floor of the original Techbuilt part of the house. At the top of the stairs we have a balcony that overlooks the living room and gallery. The balcony leads to our new master bedroom suite.
We chose to go with a custom-built floating stair system. The stair treads and handrails are mahogany which is a nice contrast to the lighter colored oak floors, black metal, and vintage brick fireplace.
Having the floating stair system adds to the wide open feel of the main living space and the construction is consistent with the industrial feel of the steel beams that support the Techbuilt side of the house.
-

Recycled Redwood Interior Siding
Our Techbuilt house sported some awesome redwood shingles that were used as siding in the entrance hall and one wall of the living room.
When we gutted the house, we asked the builder to keep the usable shingles.
As the house was being rebuilt, we looked for places that we could re-use the material and found several, including behind where the bed will go in the master bedroom.
The material looks amazing. And it is extra special because you can no longer get redwood. How exciting that these shingles will live on in the house where they were originally installed nearly 60 years ago.
-

Main Room Floor and Beams
The main room is getting close to completion and it looks great. This room is the entire ground floor of the original Techbuilt house plus half of the second floor (which we opened up by removing two bedrooms).
We particularly love the 8″ wide plank “character grade” oak floors in the main room. We went with the extra wide planks so that much of the character of the wood would show.
Some great knots and wormholes!
Interestingly, character grade is less expensive than the prime of select grades of wood flooring, which is an added bonus since we prefer character grade.
Character grade generally refers to prominent color variations and a large amount of characters such as knots, open checks, and wormholes.
The metal beams that were installed to reinforce the structure of the Techbuilt part of the house after the two bedrooms were removed have been painted glossy black and they are AMAZING!
-

Choosing Soapstone Kitchen Countertops
In ten degree late December we journeyed to New Hampshire to choose our soapstone slabs.Mike Myers, an owner of Jewett Farms took us out to look at the slabs. Each has different qualities of color and veining.
We chose Santa Rita Venata from Brazil. It was the most “alive” of the choices. Since our cabinets will be light grey, we wanted the counters to be more of a showcase.
We like soapstone for a variety of reasons besides its beauty.
- Soapstone is non-porous which makes for an extremely functional and virtually worry free surface. Red wine spills, coffee cup rings, drips of balsamic vinegar are not a worry.
- Soapstone can withstand direct heat allowing pots and pans to move directly from range to counter without trivets or any fear of damaging the surface.
- Soapstone doesn’t require a chemical sealer nor chemical based specialty cleaning products. You can clean with something simple like vinegar and lemon juice.
We will apply a coating of mineral oil to darken the stone and enhance the natural veining.
-

Exterior Paint
The exterior of the entire house is nearly complete.
The new roof of the original house was installed last week and the painters need just two more days to finish a second coat of trim.
The paint on the shingles and around windows is Sherwin Williams Colonial Revival Gray (ironic given it is a modern house!).
The trim is white (not sure exactly what shade of white).
Metal around the windows and the wooden beams are black.
Exterior tile is tan.
And the 24 gauge Galvalume metal roof is Dove Grey.